How I’ve been creating ways for player customization

Yesterday I went with a handful of other college students to repaint doors, because my college has a community service day when students do stuff. Like painting doors. Inspired by that bout of manual labor and how nice it was to see the doors before and after, I decided to look at customization options in my game. Trust me, it’s more interesting than if I explained how doors work in RPG Maker MV.

What do you mean by customization options?

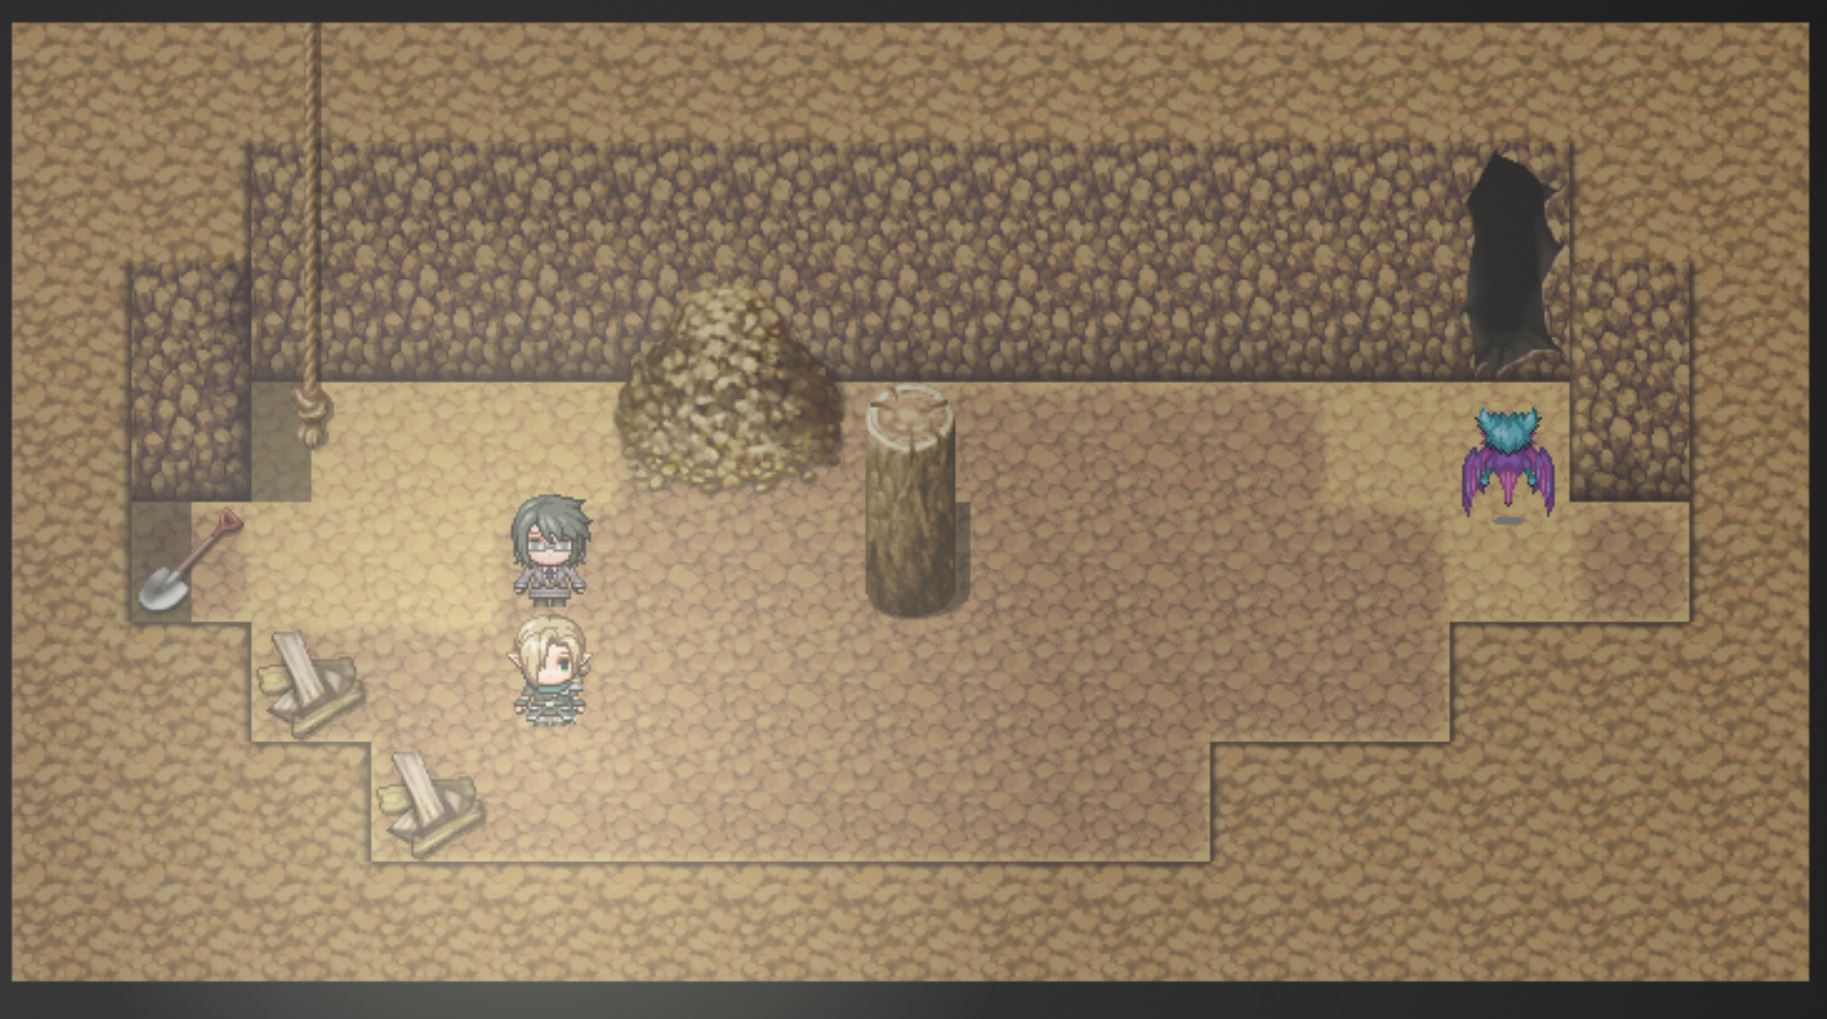
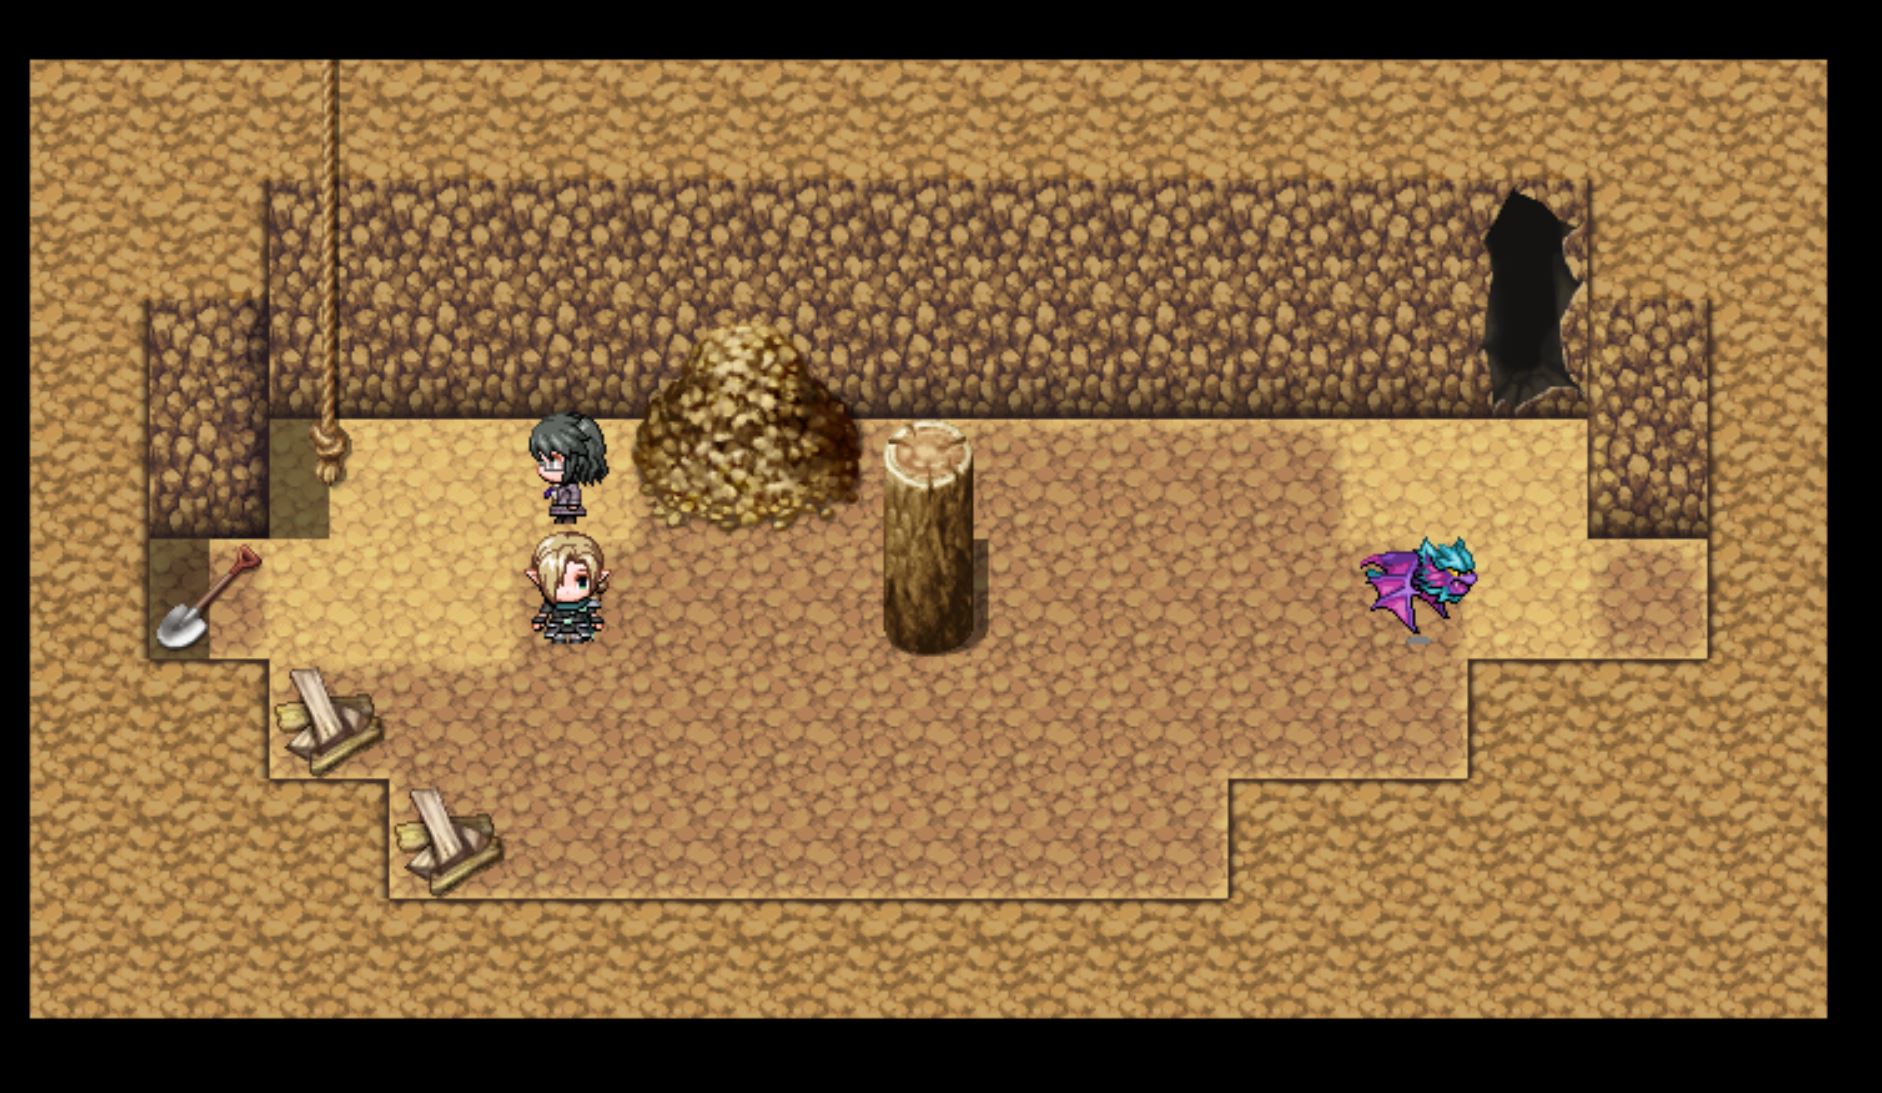
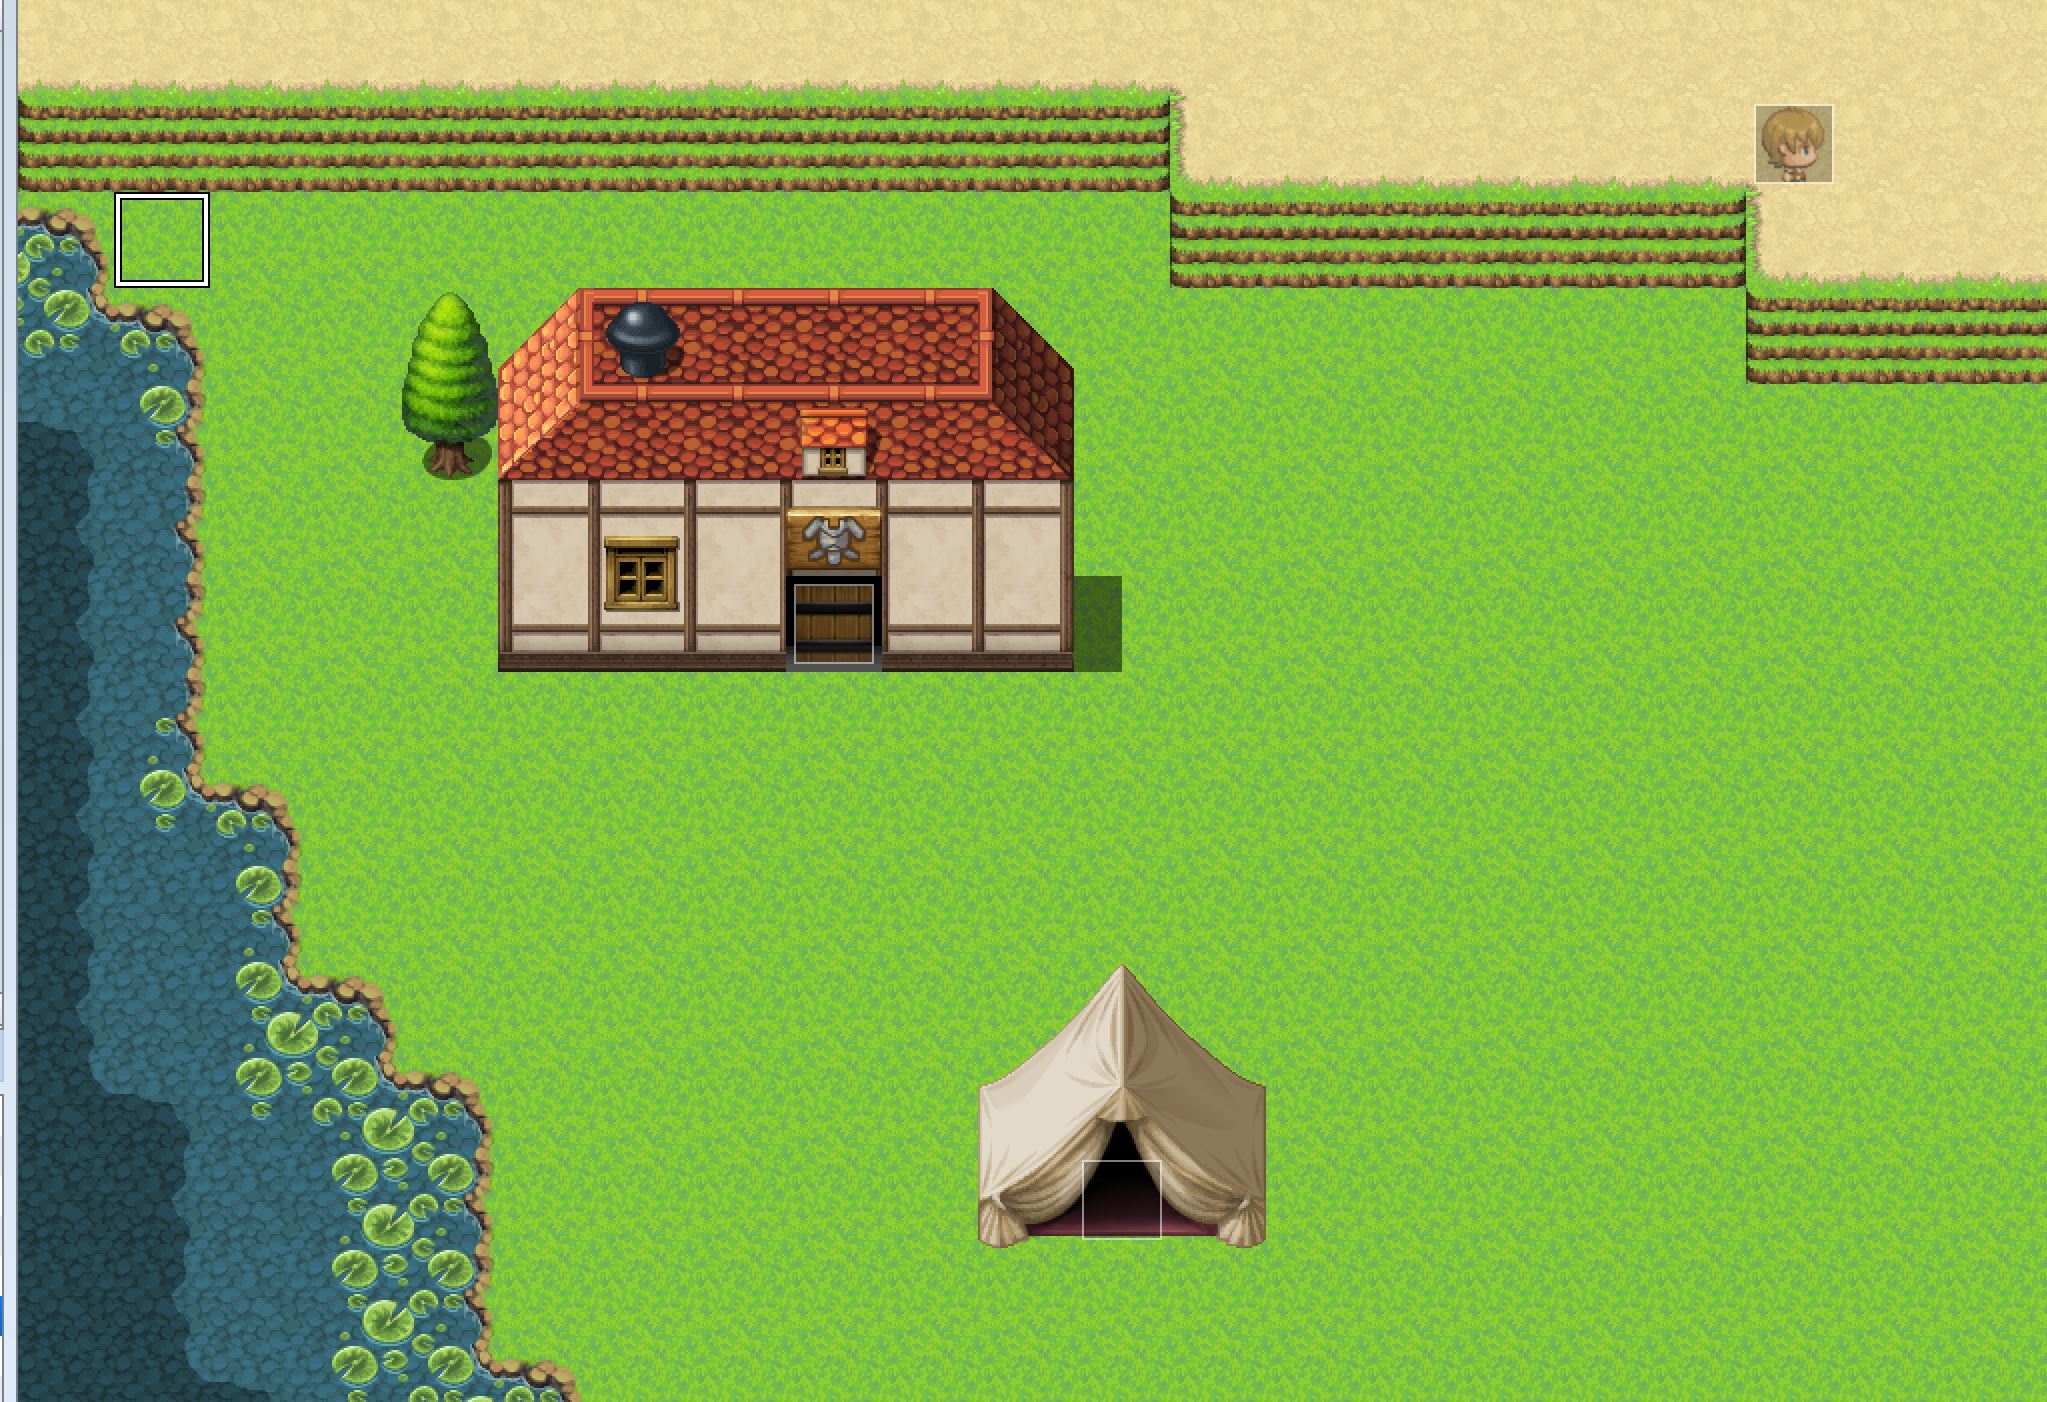
Basically, letting the player pick what something looks like. For example, below is a photo of a very plain room I created just for this post. See the bedside table? It’s rather plain. So I whipped up a small event that lets the player pick if they would like to add a vase of flowers on the table, or just throw a cloth over it.

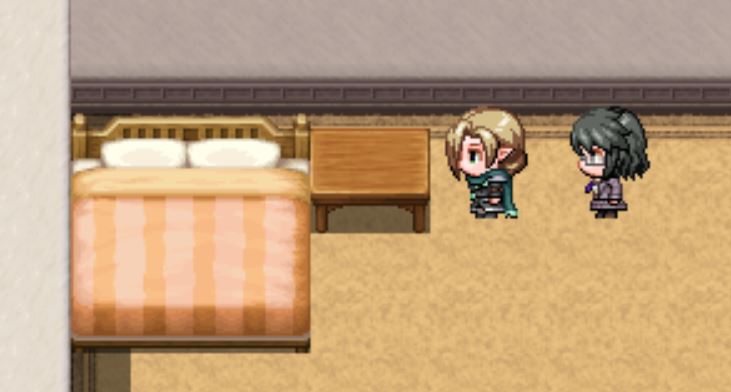
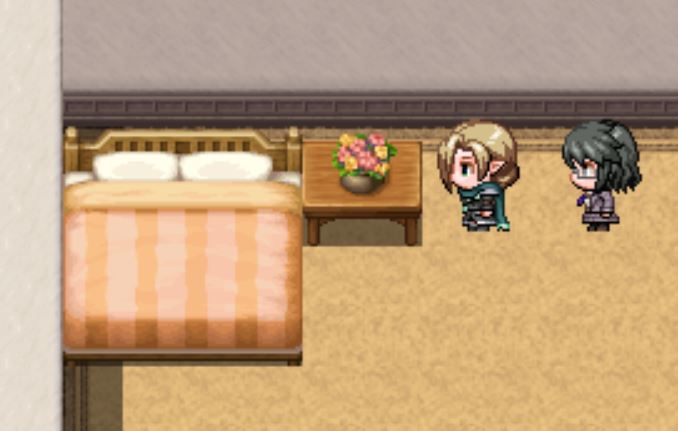
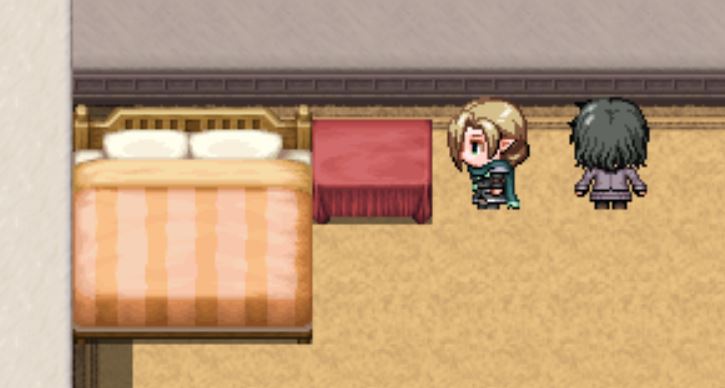
Ta da! Admittedly, it’s a tiny change, but it’s better than nothing.

Will any of the characters be customizable?

No, no they won’t. In part because I haven’t figured that out, though I know it’s possible, and because each cast member has a specific look for a reason. I’ve tried to use some visual storytelling with each of their appearances. Maybe that’ll be a later blog post. If you don’t know the cast, I briefly introduced them in my first blog post.

Okay, but how’d you make the table change?

If you remember my second blog post, I briefly mentioned switches. These little guys have to options, on and off. Now, one great feature of RPG Maker MV is that each event has several self-switches. (I briefly explain events in this blog post.) Basically, self-switches are switches that only apply to that event.

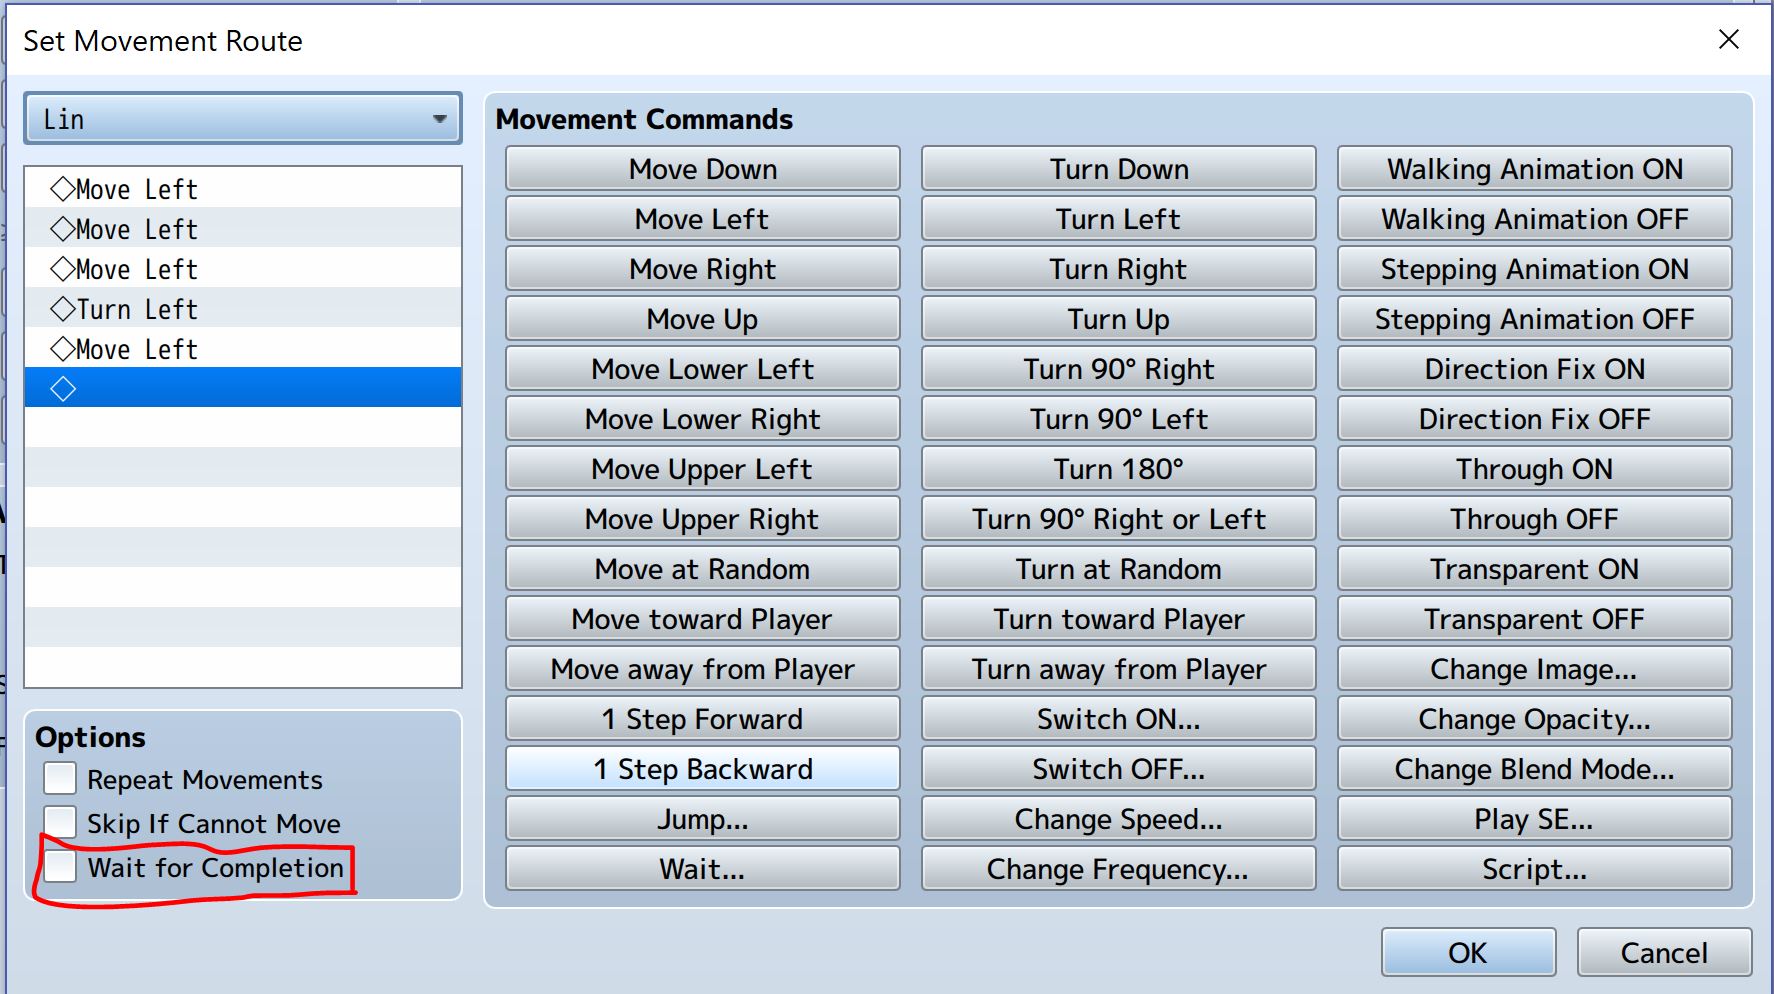
So, what I did was create an event, the one in the photo below, where the player has two choices. Add flowers or a cloth.

The event page.

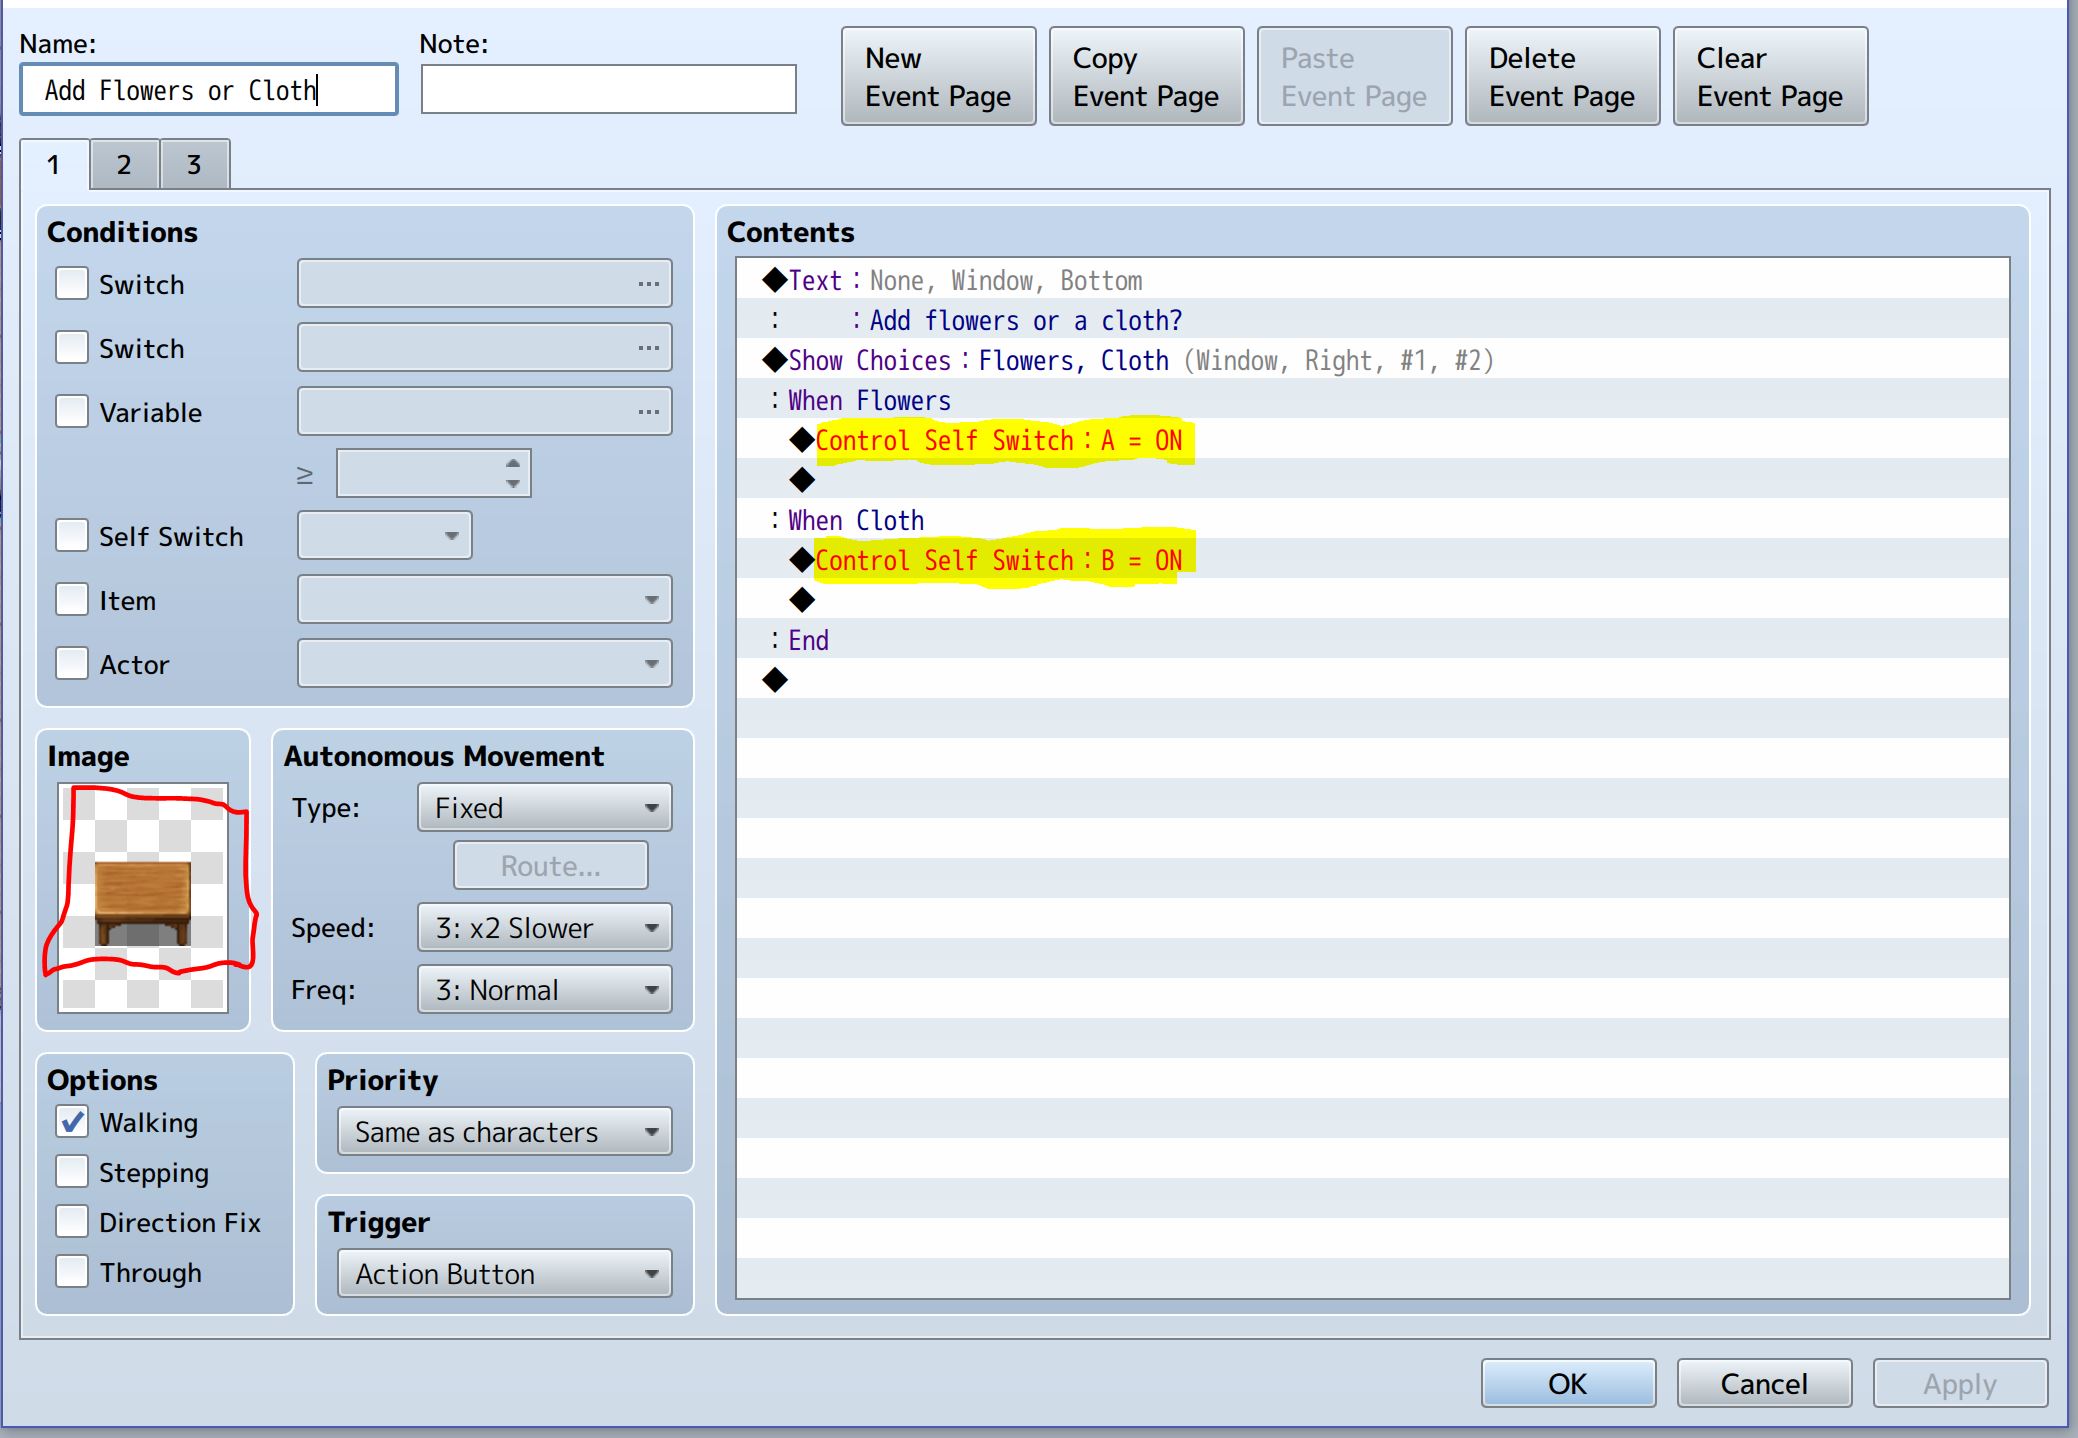
See the highlighted sections? If flowers are picked, self-switch A is turned on, and if cloth is picked, B is turned on. Now, how does this allow different images to appear on screen?

That’s quite simple. Look at the red square. See the plain table inside? That little area, the place fittingly called “Image,” is where you can add an image for the event. Now, this event has three event pages. For simplicity’s sake, imagine each event page is a different event.

Now, the other two pages are key to the image change. Event page two is below.

Event page two.

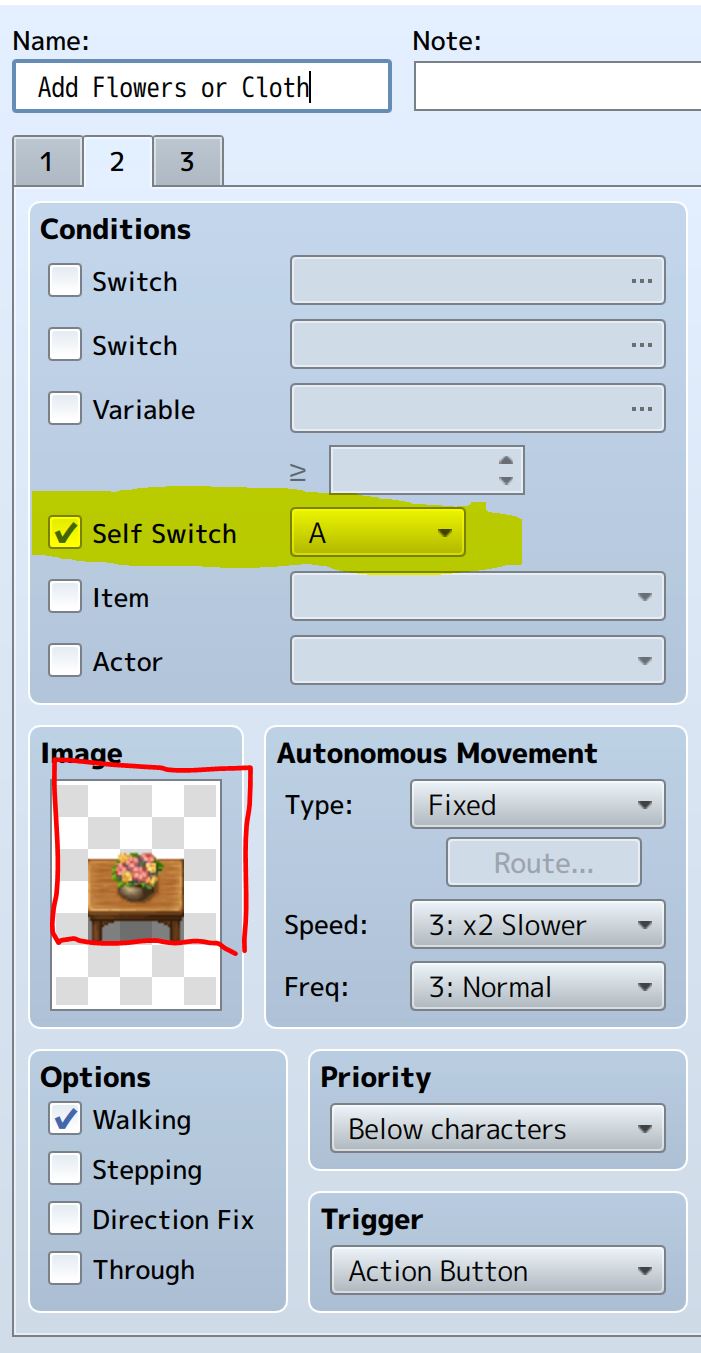
See the highlighted area? That basically means that this event page only happens if self-switch A is on. If A is off, it doesn’t run; it doesn’t change the appearance of the image. Now, look in the red square. It’s the table with a vase of flowers.

Now, there’s a lot more to say about event pages and how they work, but this post is long enough. Please leave any remarks or questions you have in the comments. I’d like to know, what do you guys think about customization in games? Do you like it? Do you think it’s useful? Thank you for reading this far, and have a lovely day!

Tips, tricks, and tiny things I’ve learned about RPG Maker MV

Throughout my experience creating my first game, I’ve learned a lot about RPG Maker MV. A lot of it I’ve wanted to share, but most of it wouldn’t create a full blog post on its own. I’ve tried to sprinkle some into blog posts, like when I talked about how useful the shadow pen is, and when I talked about how to create different facial expressions. There’s still some I’d like to talk about. Thus, today’s topic of tips and tricks.

Just know that if you’ve worked in RPG Maker MV before, you might be surprised at how clueless I was at first.

How to get two characters to walk at once in a cutscene

Trying to get two characters to walk at once in a cutscene was the bane of my existence for so, so long. And the solution was so, so simple.

RPG Maker MV has these things called events where creators can do all kinds of stuff, from playing sounds to moving other events. That last bit is important. I’ll try to keep this simple. In any given map there are dozens of events, and some of those are characters.

I’ve been creating cutscenes by moving specific events in a certain order. The cutscene event runs and when the time comes, it can move characters. But the default option is that the next part of the event will not run until the previous part is finished. I didn’t realize I could change this for way too long.

Below is the movement panel.

See that little red rectangle? See how there’s an option labeled “Wait for Completion”? I didn’t. Not until weeks into the game. All I had to do to get two characters to walk at the same time was to remove the check.

And this little option, the “Wait for Completion” option, exists in a few other places. Realizing that option exists has made everything much, much easier.

Changing the character starting position is important

RPG Maker MV makes it super easy to change the starting position of the main character. And this has come in handy when testing for bugs. For example, the forest map I showed off in this blog post is unreachable in the current game. I haven’t created a place for it in the overworld yet, so I have to put the character’s starting position in the forest map if I want to travel there.

Technically. I could create a way to enter it from the overworld, but my overworld is just a placeholder. And just plopping myself straight into the map was easiest for playtesting.

Always take my headphones off before playtesting

This lesson was learned the hard way. I opened the game, ready to test out a new event, and my ears were bombarded with static and the screen was white. When I threw my headphones off, I could still hear the static coming from them. I wasn’t even messing with sound, just images.

I still don’t know how exactly I managed to mess up an event badly, but I deleted the event and I’ve been a lot more cautious about playtesting.

In conclusion

There’s still a lot I have to learn about RPG Maker MV and game creation. But I’d like to think I’ve come a long way! Even if you never use these tips, hopefully you can still enjoy this post and find some humor in the odd situations I’ve gotten into.

There won’t be a blog post next week because I’ll be on spring break! But I’d love to know what you thought of this post, and please let me know what you’d like to learn about for the next blog in two weeks.

How I’ve created a lantern effect in my game

Inspired by a recent trip to sunny Florida, I’ve been focusing on lighting in my game. RPG Maker’s default graphics are naturally bright and well lit. This works well in outdoor maps, but it looks odd for dungeon or underground maps.

In my last post I briefly touched on the shadow pen, which is better at creating dept than darkness. So, I’ve been working on a solution to create a different form of lighting. Right now I’m just focused on creating one form of lighting; a lantern effect.

What is a lantern effect?

Like most RPGs, I’ve got underground maps. The only problem is that they’re too bright with RPG Maker MV’s default graphics. I could create new graphics, but I’ve mentioned why I’m against that in my first post.

So instead of creating new graphics from scratch, I’m creating a lantern effect. Basically it’s a halo of light that follows the player. This makes it look like the player is holding a lantern. Thus, the lantern effect. Below is how it currently looks in my game.

The tunnel with lighting around Ann and Lin.

I’ve got a halo of light that follows Ann’s x and y coordinates. This gives off a lantern-like effect. It’s not perfect, but it’s better than the original appearance below.

The tunnel without any extra effects.

I’m still going to mess around with this effect and see how I can improve it. And it’s worth noting that I got the idea for the lantern effect from this YouTube video. It’s also got some other lighting tricks I’ll have to check out at a later date.

How’d I create this effect?

One of the many options RPG Maker MV has is the option to put pictures on the screen. The lantern effect is created by putting an image on the screen that is attached to the player’s X and Y coordinates.

The picture behind the lantern effect.

Above is the image projected onto the screen to create the lantern effect. It’s mostly transparent so it doesn’t completely block out the graphics underneath it. I also have some gray around the yellow spot to create the impression of darkness.

Are there any other lighting effects?

At the current moment, no. I’ve been trying to create sunlight, but it ends up not looking so good. I’ll have to keep editing the image and messing around before I get it ready to implement into the game.

In conclusion

Lighting has been quite the challenge so far. I didn’t expect creating a picture to take so long, or require so many edits. Trust me when I say that there were quite a few potential lantern effect pictures that didn’t make the cut.

Thank you for reading this far! Please let me know what you thought in the comment below. Do you think that the lantern effects looks OK? Any advice or criticism? I’d love to hear anything you have to say!

How I’ve created my maps in RPG Maker MV

Map making was an interesting challenge I had to tackle. Creating good maps is important since no one wants to wander around an empty rectangle looking for the next plot point. So I’ve been tacking map creation!

RPG Maker MV’s lovely map creation

I’ve gotta say, map making in RPG Maker MV is pretty enjoyable! All it took was some brief tutorials and I was on my way. Like most of RPG Maker MV, no coding is involved, just a lot of clicking. And with some practice, I was even able to create some maps I’m pretty proud of!

The first map I showed in my first post.

If you’ve read some of my previous posts, this map should look familiar. It’s one of the most recent maps I’ve created. My first maps didn’t look nearly as good.

How bad could the maps be?

A part of the first town map I created. It’s basically a really big, mostly empty rectangle.

This was one of the first maps I ever created. It’s basically barren, aside from the structures and the child NPC in the upper right corner. (Side note, this is the child NPC I talked about in my post from two weeks ago.)

The actual map is quite a bit bigger than what’s in this picture. And the rest is just as boring. At some point, I’ll go back and redo this map, but for now, it serves its role as a placeholder when I’m playtesting.

My newest attempt at a town.

This map is still a work in progress. It’s supposed to be an abandoned mountain town. (Hence the excessive amount of vines.) This map is far from perfect, but it’s definitely a step above the previous town map. There’s variety in the buildings, but they all look like they might belong in the same town. And there’s more decoration and scenery. I might have gone overboard in some places, but it won’t take much to trim it down.

Ann and Lin’s home.

This map is one I’d rate as somewhere in the middle. It’s not my favorite, but I’d say it’s fairly nice. It was one of my earliest maps, but I’ve done my best to make it look better. Although I could probably cut down on the amount of extra green grass in the right-hand corner.

The shadow pen’s usefulness

I believe the shadow pen is one of the most underrated features of RPG Maker MV’s map creation. It’s pretty darn useful. RPG Maker MV does it’s best to try to add shadows where it believes they should be, but having the ability to place them myself is helpful.

Above are examples of places where I used the shadow pen tool to add some depth to my maps. You might recognize them from two of the maps I showed today.

In conclusion

Thank you for reading this post! Feel free to post a comment down below! And now, I’d like to ask you guys, what was your favorite map?

How I created my characters with RPG Maker MV’s character generator

Characters are the heart and soul of a game. They breathe life into the world and story. So when I set out to create a game, I spent a decent bit of time working on my characters. In my first post, I introduced the main cast. Now I’ll show you how I created them!

The nitty-gritty details of RPG Maker MV’s character generator

One of the things RPG Maker MV has going for it is its character generator menu. It’s surprisingly easy to use and detailed. At least for adult characters. The child character section is lacking unless you want to pay for an expansion pack.

The character creation menu, featuring the main character, Andromeda.

With a few clicks of the button, a character is born! Just remember to hit “Save Settings” once you’re happy with the character. Otherwise, you’ll have to redo everything if you want to make a change. I totally didn’t make that mistake. Twice.

The menu itself is quite easy to use. There are categories (ex. face, tail, glasses) with options inside. Simply click one of the options and RPG Maker MV does the rest. And custom art can be added to the menus.

Some of the eye options for RPG Maker MV.

The variety of facial options also allowed me to create different facial expressions for the main cast!

Why different facial expressions are vital

It can get old fast in an RPG when the character has the same face image for every line of dialogue. It can also be distracting to see the same static face when it’s inappropriate for the current situation. For example:

Bad use of the character’s facial expression.

In this line, Lin is supposed to be reluctantly agreeing with Ann. But the image of her face is of her smiling. It’s distracting and confusing. Why would she smile? Isn’t she worried? The discrepancy between the dialogue and the image sticks out like a sore thumb.

A better use of facial expression.

Now, look at Lin’s face. All I changed was her eyebrows and her mouth, but that’s all it takes to completely change her expression. Now the player can see the doubt on Lin’s face. It’s a small touch that adds a lot to dialogue boxes.

Now another option is just to not have the face image for the dialogue box. It’s possible to do so, and several RPGs do exactly that. But games are a visual media. I believe not using some sort of visual representation for a character’s emotions is a massive lost opportunity to bring life and character to the characters.

In conclusion

It was a lot of fun creating my characters in the character generator. Once I got the hang of it, it was one of my favorite things to mess around with. And it also adds a lot to the game!

What do you think about characters in video games? Do static face images distract you, or are you fine with them? Or do you prefer another method? Let me know in the comments below, and thanks for reading!

How I’ve built dynamic character relationships

Since Valentine’s Day is upon us, I figured this was the perfect time to talk about how I’m making player choice affect the character’s relationships with each other! If you need a refresher on who the characters are, please see my last post.

Why do character relationships matter?

One of my favorite parts of a game is seeing how characters grow and bond with each other. Whether it be romantic, platonic, familial or something else, character relationships are important and impactful. So I’ve been working on ways to implement this into my game!

It’ll be important to have a positive relationship with the rest of the party. If the player harms their relationships with the party, they’ll act differently. They might not trust the player, which could make the game harder.

On the flip side, a positive relationship could open new doors for the player. The party would trust them, and there would be less conflict overall in the group.

OK, but how are you going to do that?

It was interesting to try to tackle the nitty-gritty details of how exactly I was going to do this. How could I allow players to build relationships with the rest of the party? Or allow players to destroy relationships? The main way I decided to do this is with variables.

It’s a fairly simple thing to create and alter variables in RPG Maker MV. Now, you might be wondering what a variable is. A variable is a value that can be changed throughout the game. Still confusing? Here’s an example to help.

One of the variables in the game is labeled “Lin’s Affection.” This variable has a value that starts at 0. Player choices can raise or lower this value. For example, the player can be rude to a child NPC. This lowers the variable “Lin’s Affection” by 5. This would make Lin’s Affection -5.

Lin’s dialogue showing the player that she’s displeased with how they treated a child NPC.

Now that I have this variable, I can use conditional branches to create different options. For example, in a cutscene, I can have Lin act differently based on her affection level.

A happy moment between the sisters.

This screenshot is from a cutscene. In the cutscene, the group isn’t sure if these woods are safe. Ann walks to the river, looks around and says its fine. If the variable “Lin’s Affection” is positive, Lin walks over to the river and stands near Ann. The two reminisce about their home.

Now let’s see a screenshot from the same cutscene if the variable “Lin’s Affection” is negative.

Lin distrusting Ann’s judgment.

This time Lin doesn’t go to the river when Ann says it’s all clear. Because of how the player has acted, she doesn’t trust Ann as much. Because of the player’s actions, they miss out on a touching moment between the two sisters.

Is that the only way you’re going to do this?

No, but this will be the main way. I will also likely have switches (similar to variables, but they have two options, on or off) based on the player’s actions. For example, a switch based on whether the player returns a book to Harvey.

What’s next?

Next week I will likely not be posting a new blog post. If I do, it will be a shorter blog post. But I will be back in two weeks with another proper blog post!

Let me know what you thought about this post in the comments below! Please put any questions you have down there. Finally, what would you like to see in the next big blog post two weeks from now?

First steps forward, the basics of my RPG.

How are you going to make the game? What sort of game will it be?

The game is going to be an RPG. It will be made with RPG Maker MV. I will be using the Steam version. I don’t have a title at the moment. Currently, I’m focusing on mastering RPG Maker MV, creating interesting characters and designing the world.

The plot is simple; Andromeda (the main character) and her sister discover their mother is missing. After investigating a little, they discover that monsters are starting to appear more frequently around the world. The sisters and a few friends quest to find out what happened to their mother and what’s going on with the sudden surge of monsters.

One of the maps in the game. If you want to learn about basic map making in RPG Maker MV, click here.

Wait, are you seriously using the basic RPG Maker MV graphics?

Yes, for now, I’ll be using them. I’ll also be using music and graphics from the Essential Set DLC. In the future, I might change the graphics, but it’s not my main priority right now.

The party members

Andromeda
(Ann)

Meet Andromeda, the main character. Most people refer to her by her nickname, Ann. She’s an elf who lives with her parents and sister. Ann’s known to be gentle and sweet, but during gameplay, the player can change this. Player choice will affect how her party views her, how NPCs react to her and more.

Lin

Lin is Andromeda’s adopted human sister. She’s a professional translator and spends most of her time working in her room. She’s a perfectionist and a planner. Lin will also often call out the player’s choices.

Harvey

Harvey is a traveling medic who often stops in a town near Ann and Lin’s home. He’s the group’s navigator and healer. He is the most cautious of the group and tends to be protective of the party.

Connor

Connor is a blacksmith in a town near Ann and Lin’s home. He joins the sisters early on, concerned about their lack of fighting skills. He’s the boldest member of the party.

That’s all of the party members at the moment. It’s unlikely that I’ll add any more. As I continue to create the game, the characters might change. Keep that in mind, as right now, not much is set in stone about the party. I used the character generator in RPG Maker MV. If you want to learn more about it, click here to watch the tutorial I used.

What’s next?

I’ll be working on nailing down how the event system in RPG Maker MV works. If you have any questions, comments or suggestions, please leave them in the comments below! And let me know what you think about the characters, how they can be improved, etc.

Thanks for reading!